Propagating Curly Bonnie Spider Plant Babies
How to Propagate Curly Bonnie Spider Plant Babies Successfully
A simple, beginner-friendly guide to rooting curly spiderettes the right way
If you’ve got a curly Bonnie spider plant, you already know—these aren’t your average spider plants. Those signature twists and curls make them unique, but they can also leave you wondering if propagation works the same way. The good news? It does… with a few small differences that can make a big impact.
In this guide, I’ll walk you through exactly how to propagate curly Bonnie spider plant babies (also called spiderettes), whether you prefer water, soil, or a simple humidity method. You’ll learn what works best, what to avoid, and how to get strong, healthy roots so your new plants actually thrive—not just survive.
How do you propagate curly Bonnie spider plant babies?
Curly Bonnie spider plant babies (spiderettes) are propagated by cutting a mature baby with visible root nodes and placing it in water or well-draining soil. Keep the plant in bright, indirect light and maintain consistent moisture until roots develop. Once roots reach 1–3 inches long, the plant can be transferred to soil to continue growing. There are three main methods to propagate curly Bonnie spider plant babies: water, soil, and layering.
Propagating Curly Bonnie Spider Plant Babies From Cuttings
Curly Bonnie Spiderette Root Node Close-Up

Spider Plant Runners and Nodes on Curly Bonnie Spiderettes

Curly Bonnie Spider Plant Root Nub Formation

The Smallest Curly Bonnie Spiderettes After Cutting

Curly Bonnie Spider Plant Propagation Methods
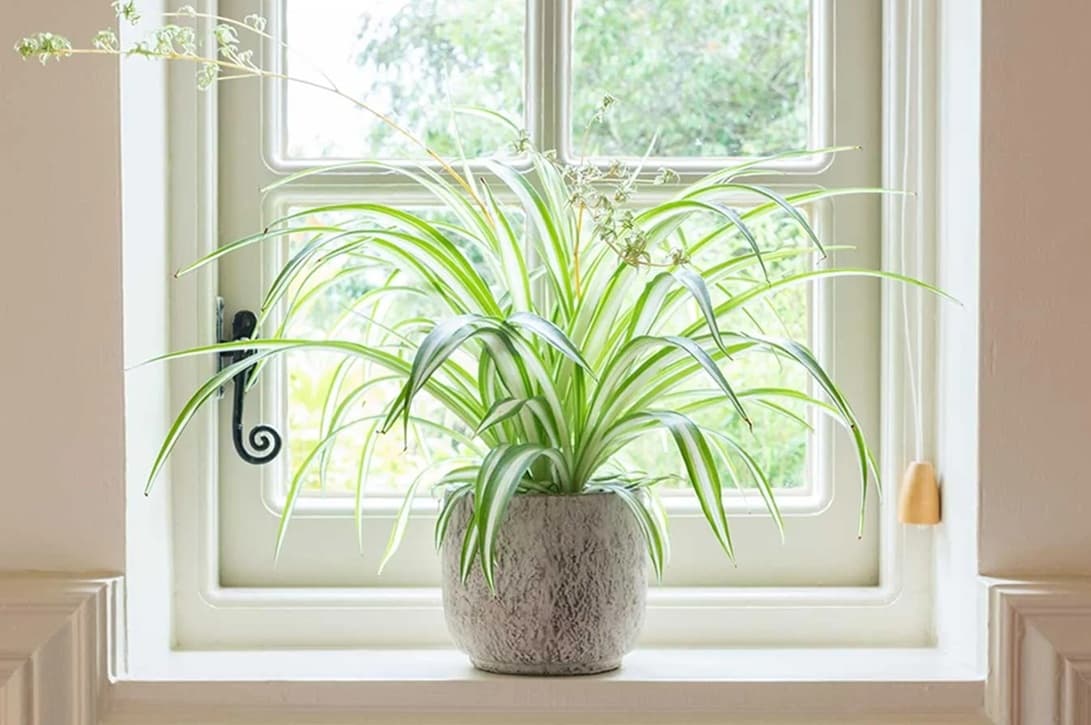
Propagating curly bonnie spider plant babies indoors
Propagating curly Bonnie spider plant babies (also known as spiderettes) is one of the easiest and most rewarding ways to expand your plant collection. Because of their naturally curled leaves and compact growth habit, Bonnie spider plants behave slightly differently than traditional spider plants during propagation—especially when it comes to moisture control and airflow.
There are three highly effective methods for propagating curly spider plant babies: water propagation, direct soil planting, and layering while still attached to the mother plant. Each method has its own advantages depending on your setup, experience level, and how quickly you want results.
Water Propagation (Best for Monitoring Root Growth)
Water propagation is one of the most popular methods because it allows you to clearly see root development and track progress in real time. This method is especially helpful for beginners or anyone wanting more control over the rooting process.
Start by selecting a healthy spiderette from the mother plant. Look for a baby with a firm base and visible root nodes (small bumps where roots will form). Using clean, sharp scissors, carefully snip the spiderette from the runner.
Place the base of the baby plant into a small jar or glass of clean water. Only the root area should be submerged—keeping the leaves out of the water is critical to prevent rot and bacterial growth. Position the container in bright, indirect light for best results.
Within 1 to 2 weeks, roots will begin to form. Allow them to grow to about 1–3 inches long before transplanting. Once the roots are established, move the plant into a well-draining potting mix. This transition stage is important, so keep the soil lightly moist while the plant adjusts from water to soil conditions.
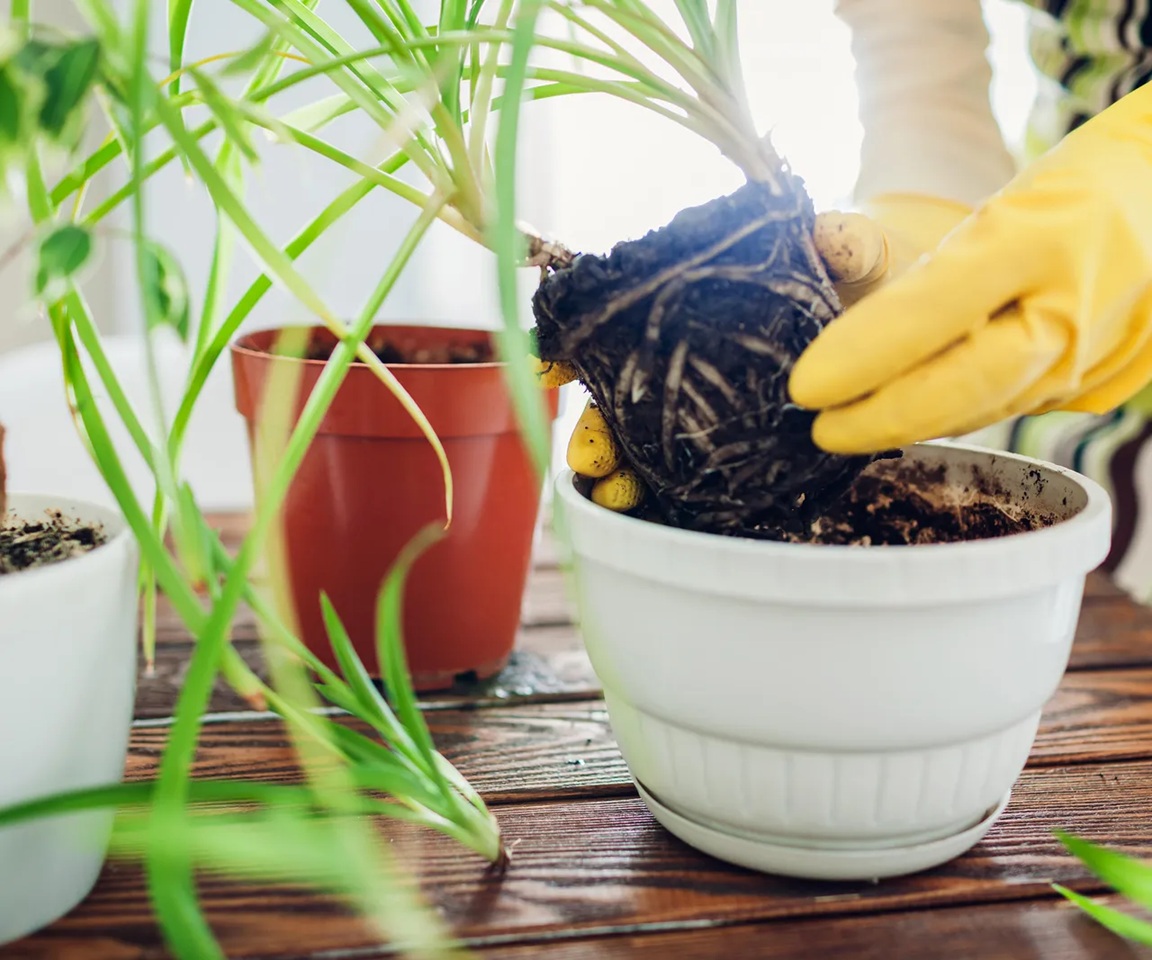
Direct Soil Propagation (Fast and Low Maintenance)
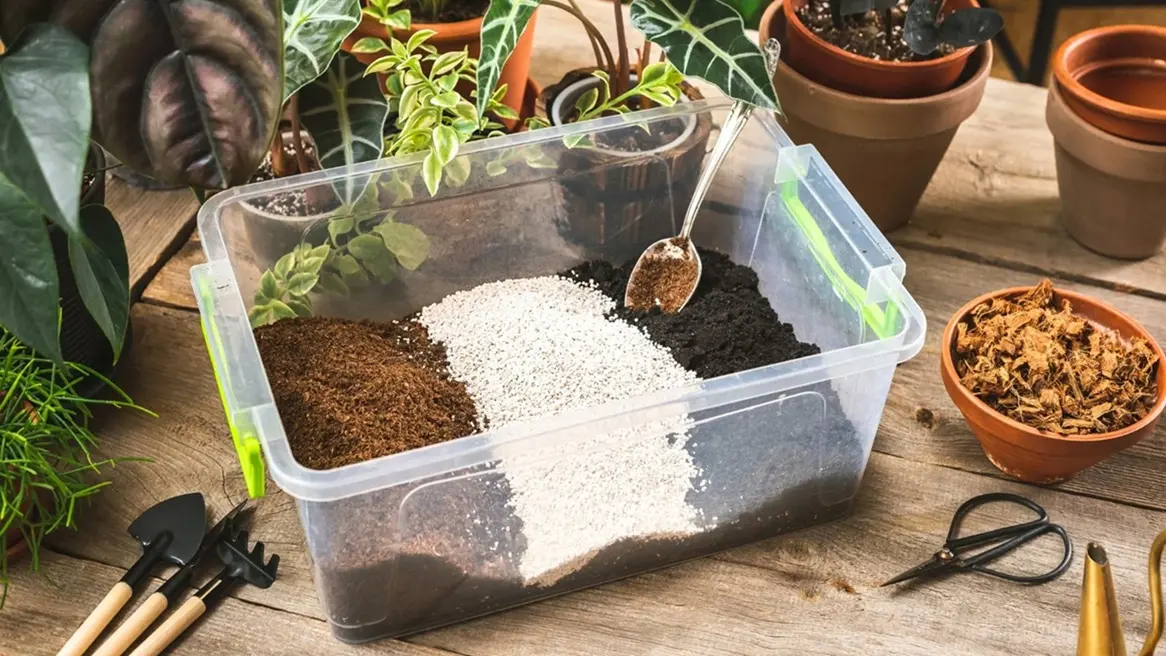
Direct soil propagation skips the water step entirely and allows the spider plant baby to root directly in its final growing environment. This method is ideal if you prefer a more natural approach and want to avoid transplant shock later.
Choose a mature spiderette with visible root nubs at the base—this is a sign it’s ready to establish quickly in soil. After cutting it from the runner, plant the base directly into a pot filled with well-draining potting mix. A blend designed for houseplants works well, especially one that includes perlite for airflow.
After planting, gently press the soil around the base to secure it. Water lightly so the soil is evenly moist, but never soggy. Overwatering is the most common mistake at this stage, especially with curly Bonnie varieties, which can hold moisture differently due to their curled leaves.
For the first 2–3 weeks, keep the soil consistently moist while roots develop. Placing the pot in a warm, bright location (without direct sunlight) will encourage faster root growth. Once established, the plant can be cared for like a mature spider plant.
Layering (Propagation While Attached to the Parent Plant)
Layering is one of the easiest and most foolproof propagation methods because the baby plant continues receiving nutrients from the mother while it develops its own root system. This method often results in the strongest, most resilient new plants.
To begin, place a small pot filled with fresh potting soil next to the parent plant. Without cutting the runner, position the spiderette so its base rests directly on top of the soil.
Gently press the base into the soil and secure it in place using a hairpin, paperclip, or small plant clip. This ensures good contact between the node and the soil, which is essential for root formation.
Keep the soil lightly moist and place the setup in bright, indirect light. Over the next couple of weeks, the spiderette will begin developing its own root system while still supported by the mother plant.
Once you notice new growth or feel resistance when gently tugging the plant (a sign roots have formed), you can safely snip the runner. At this point, your new curly Bonnie spider plant is fully independent and ready to grow on its own.
Tips for Success When Propagating Curly Bonnie Spider Plant Babies
Propagating curly bonnie spider plant babies in water or soil
Successfully propagating curly Bonnie spider plant babies comes down to timing, environment, and understanding how these unique curly varieties respond compared to traditional spider plants. While spiderettes are generally easy to root, a few small adjustments can dramatically improve success rates, root development speed, and long-term plant health.
Choose Mature Spiderettes for Higher Success Rates
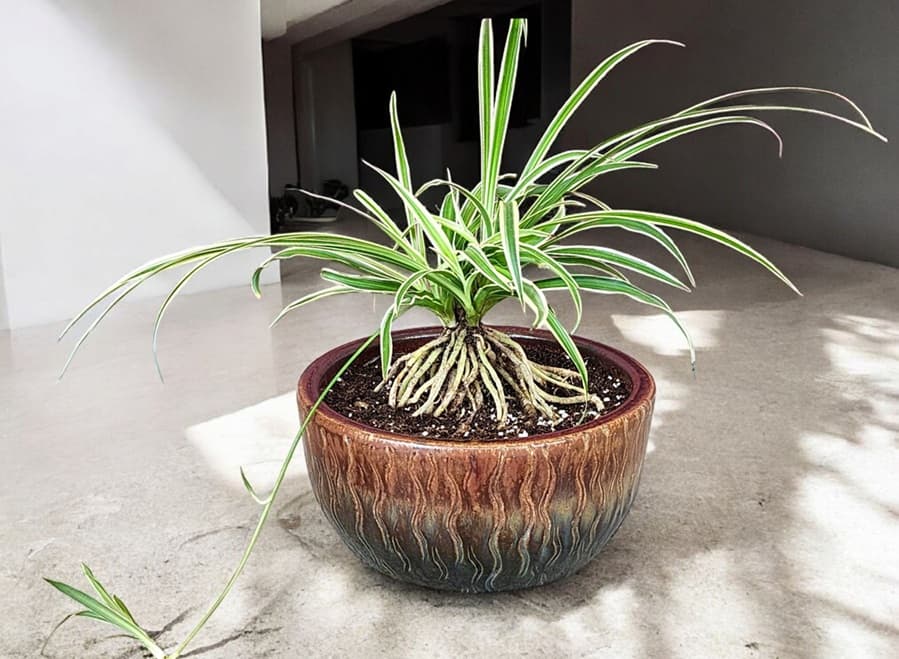
One of the most important factors in successful curly spider plant propagation is selecting the right baby plant to begin with. Always choose spiderettes that are at least 2 inches across and show visible root nubs (also called aerial roots) at the base. These small bumps are early root structures and indicate the plant is ready to begin rooting quickly once placed in water or soil.
Immature spider plant babies may still look healthy, but without developed nodes, they often struggle to establish roots and are more prone to rot or failure. Curly Bonnie spider plants, in particular, benefit from starting with stronger, more developed babies because their tightly curled leaves can hold moisture differently and create a slightly more sensitive rooting environment.
Provide Bright, Indirect Light for Healthy Root Development
Lighting plays a major role in how quickly and successfully spider plant babies develop roots. Place your propagations in bright, indirect light—such as near a window with filtered sunlight or a well-lit room. This encourages steady growth without stressing the plant.
Avoid direct sunlight, especially during the early stages of propagation. Harsh sun exposure can cause leaf burn, dehydration, and stress, which slows down root formation. Curly spider plants are especially sensitive because their curled foliage can trap heat and moisture, making them more vulnerable to damage in direct sun.
Consistent, gentle lighting helps maintain balanced growth and supports strong root development during both water and soil propagation.
Propagate During the Active Growing Season
While it’s possible to propagate spider plant babies year-round, the most successful results typically occur during the spring and summer months. This is when the mother plant is actively growing and producing energy, which translates into faster root development and stronger new plants.
During the growing season, spiderettes are naturally more prepared to root and adapt to new conditions. Propagating in fall or winter can still work, but the process is usually slower due to reduced light levels and lower overall plant activity.
If you’re aiming for the fastest and most reliable results with curly Bonnie spider plant propagation, timing your efforts during active growth periods will give you a noticeable advantage.
Use Clean, Low-Chemical Water to Prevent Leaf Damage
Water quality is often overlooked but can have a significant impact on spider plant propagation, especially with curly varieties that are more prone to showing stress through leaf discoloration.
If you’re using tap water, allow it to sit out for at least 12–24 hours before you water your spider plant. This helps dissipate chlorine and reduce fluoride levels, both of which can contribute to brown tips and slowed root development in spider plant babies.
For even better results, consider using spring water, filtered water, distilled water, or rainwater when possible. Clean water supports healthier root formation and reduces the risk of chemical stress during the early stages of propagation.
Adjusting these small details can make a big difference in how your spider plant responds.
Common Problems When Propagating Curly Bonnie Spider Plant Babies (And How to Fix Them)
Even though curly Bonnie spider plant propagation is considered easy, there are a few common issues that can slow down root development or cause spiderettes to fail altogether. Because curly varieties behave slightly differently than traditional spider plants, recognizing and correcting these problems early can make a major difference in your success rate.
Spiderette Not Growing Roots
If your spider plant baby is sitting in water or soil and not producing roots, the most common cause is starting with an immature spiderette. Babies without visible root nubs simply aren’t ready to propagate yet.
Another factor can be low light. Without enough bright, indirect light, the plant lacks the energy needed to initiate root growth.
Fix: Switch to a more mature spiderette and move it to a brighter location. Make sure the base (node) is properly positioned in water or soil, as this is where roots will form.
Rotting Base or Mushy Stem
Rot is one of the most common problems during propagation, especially in water setups. This usually happens when too much of the plant is submerged or when water isn’t changed regularly.
Curly Bonnie spider plants can be more prone to this because their curled leaves can trap moisture and reduce airflow.
Fix: Only submerge the base of the spiderette, never the leaves. Change the water every few days and ensure your container is clean. If rot has started, trim the damaged area and restart with fresh water.
Brown Tips on New Growth
Brown tips can appear even during propagation and are often caused by chemicals in tap water, inconsistent moisture, or environmental stress. This is especially noticeable in curly spider plants, where the leaf shape can exaggerate tip damage.
Fix:
Use spring water, filtered, RO, or rested tap water, maintain consistent moisture, and avoid sudden changes in light or temperature. Keeping conditions stable will help prevent further damage.
Wilting or Drooping Spiderettes
If your spider plant babies look limp or stressed after cutting, they may be struggling to adapt without support from the mother plant.
This is more common in direct soil propagation when roots haven’t formed yet.
Fix: Increase humidity slightly, keep the soil evenly moist (not wet), and avoid direct sunlight. If needed, switch to water propagation temporarily to encourage root growth before replanting.
Conclusion: Growing Strong, Healthy Curly Bonnie Spider Plants from Babies
Propagating curly Bonnie spider plant babies is one of the most satisfying ways to grow your collection, especially once you understand what these unique, curly varieties need to thrive. By choosing mature spiderettes, using the right propagation method, and creating a stable environment with proper light and moisture, you can dramatically increase your success rate.
Whether you prefer water propagation for visibility, direct soil planting for simplicity, or layering for the highest success rate, each method can produce strong, healthy plants when done correctly. Paying attention to small details—like water quality, timing, and airflow—makes a noticeable difference, especially with curly spider plants that respond differently than standard varieties.
With the right approach, those tiny spider plant babies quickly turn into full, thriving plants, continuing the cycle of growth again and again. Once established, your new curly Bonnie spider plants will not only add texture and character to your space but will also produce their own spiderettes—giving you endless opportunities to propagate and share.