How to Grow Spider Plant Bonsai (Mini Spider Plant Styling Guide)
How to Grow a Bonsai Spider Plant
Why Growing a Spider Plant as Bonsai Changes Everything About How It Grows
Want to create a spider plant Bonsai? Turning a spider plant into a bonsai-style plant isn’t something you’ll find in typical care guides—but it works, and once you understand how, it completely changes how you see this plant.
Instead of letting it grow wild and sprawling, you can shape it into a compact, structured form that highlights its natural movement while keeping it controlled and intentional. This approach isn’t traditional bonsai in the strict sense, but it follows the same idea: guiding exposed root growth over time to create something balanced, contained, and visually striking.
After sharing this method and seeing the response it’s gotten, it’s clear people are looking for a different way to grow spider plants—one that combines structure, creativity, and long-term control instead of just letting the plant take over.
Growing a “bonsai” spider plant (Chlorophytum comosum) focuses on creating a root-exposed aesthetic rather than a traditional woody trunk. Because spider plants have thick, fleshy storage roots, you can train them to grow above the soil line, giving them a unique, sculptural look in under six months.
To grow a spider plant bonsai, create a root-exposed style by planting a spider plant pup inside a bottomless plastic bottle filled with loose, breathable soil. Over 1–3 months, the roots will grow downwards, establishing a thick root system. Finally, remove the bottle and rinse the soil away to reveal the roots.
Preparation and Setup
How to Set Up Your Spider Plant Bonsai Foundation
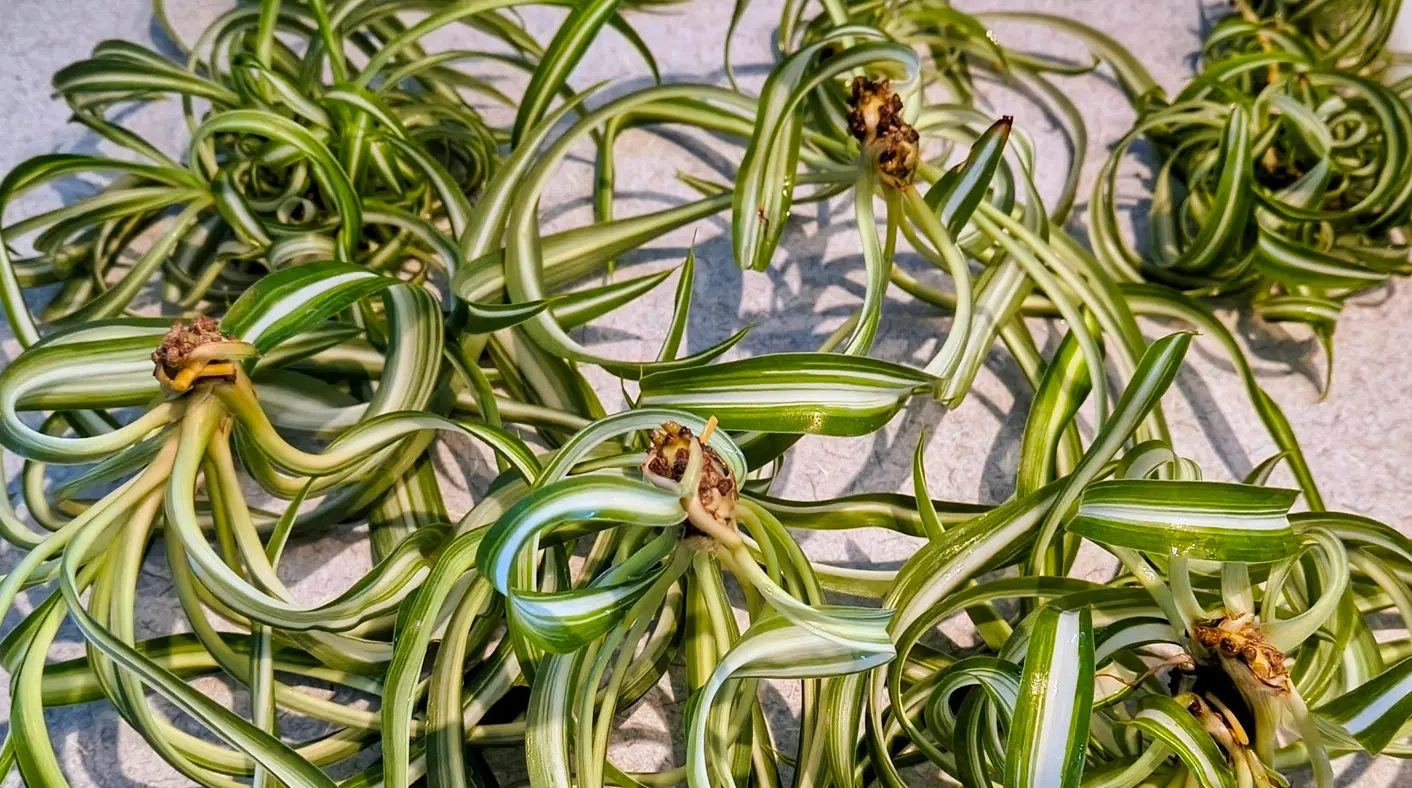
To start, you will need a healthy spider plant cutting (spiderette) with small starter roots. Choose one that already has visible root nubs or short roots forming. Very young or rootless babies can struggle in this setup, so starting with a slightly established one gives you a much better success rate.
🌿 Create a Root Tube
Take a plastic bottle or cup and cut off the bottom to form a tube. This tube is what will guide the roots downward instead of letting them spread out like a normal spider plant.
For easier removal later, cut the tube lengthwise and tape it back together. This small step makes a big difference—you’ll be able to remove the tube cleanly once the roots are established without damaging the plant.
🪴 Potting
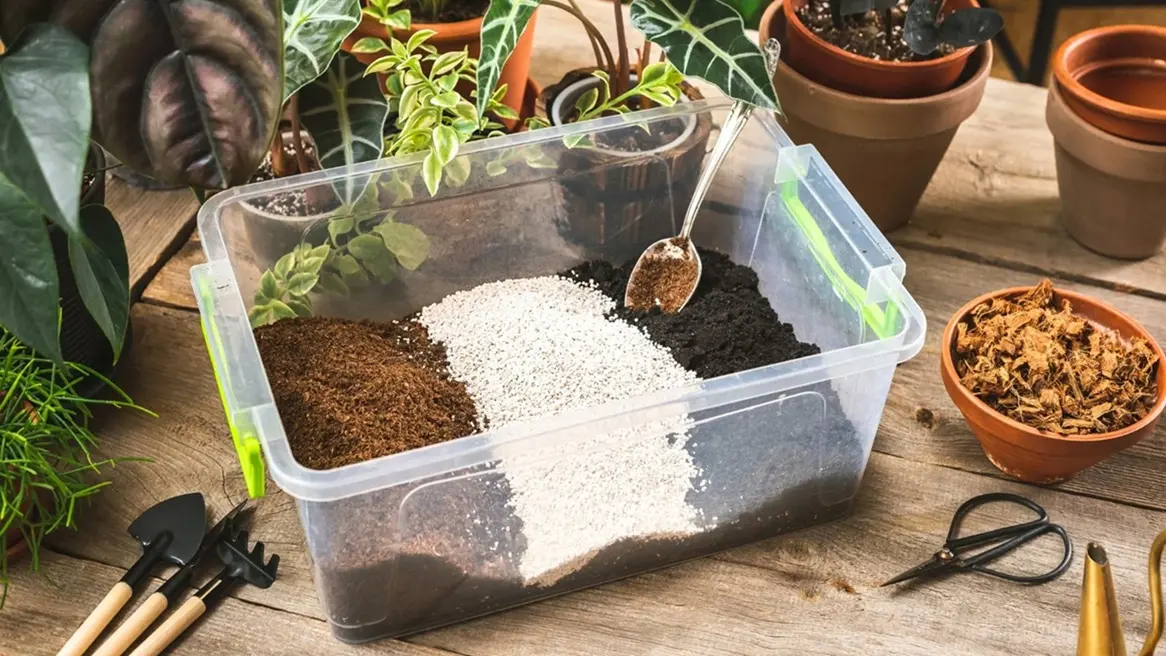
Fill a breathable pot with well-draining soil, such as a tropical potting mix. The goal is to keep the soil light and airy so roots don’t stay too wet or compacted.
Place the plastic tube vertically in the center of the pot, then fill the tube with the same soil. This creates a controlled column where the roots will grow downward, which is key to achieving the bonsai-style structure.
🌱 Planting
Barely tuck your spider plant baby into the top of the tube’s soil. Don’t bury it deeply—just enough to hold it in place.
Keeping it shallow encourages the roots to grow downward through the tube instead of spreading outward. This is what allows you to control the shape early and start building that compact, bonsai-style form from the beginning.
The Training Phase (Training The Spider Plant’s Roots)
Spider Plant Bonsai Root Training Early Stage

Guiding Root Growth for a Controlled Bonsai Shape
This phase encourages the roots to grow long and straight down into the main pot. Instead of spreading outward like a typical spider plant, you’re training the root system to develop in a more vertical, structured way—this is what creates the foundation for that compact bonsai-style look later on.
🌱 Establishment
Water thoroughly after planting and keep the soil consistently moist, but never soggy. Spider plants don’t like sitting in wet soil, so good drainage is important here.
During this stage, the focus is patience. Give the plant at least 1 to 2 months to establish strong roots that grow down through the tube and into the main pot. You won’t see much happening above the soil yet, but below the surface is where the real work is happening.
✂️ Exposure
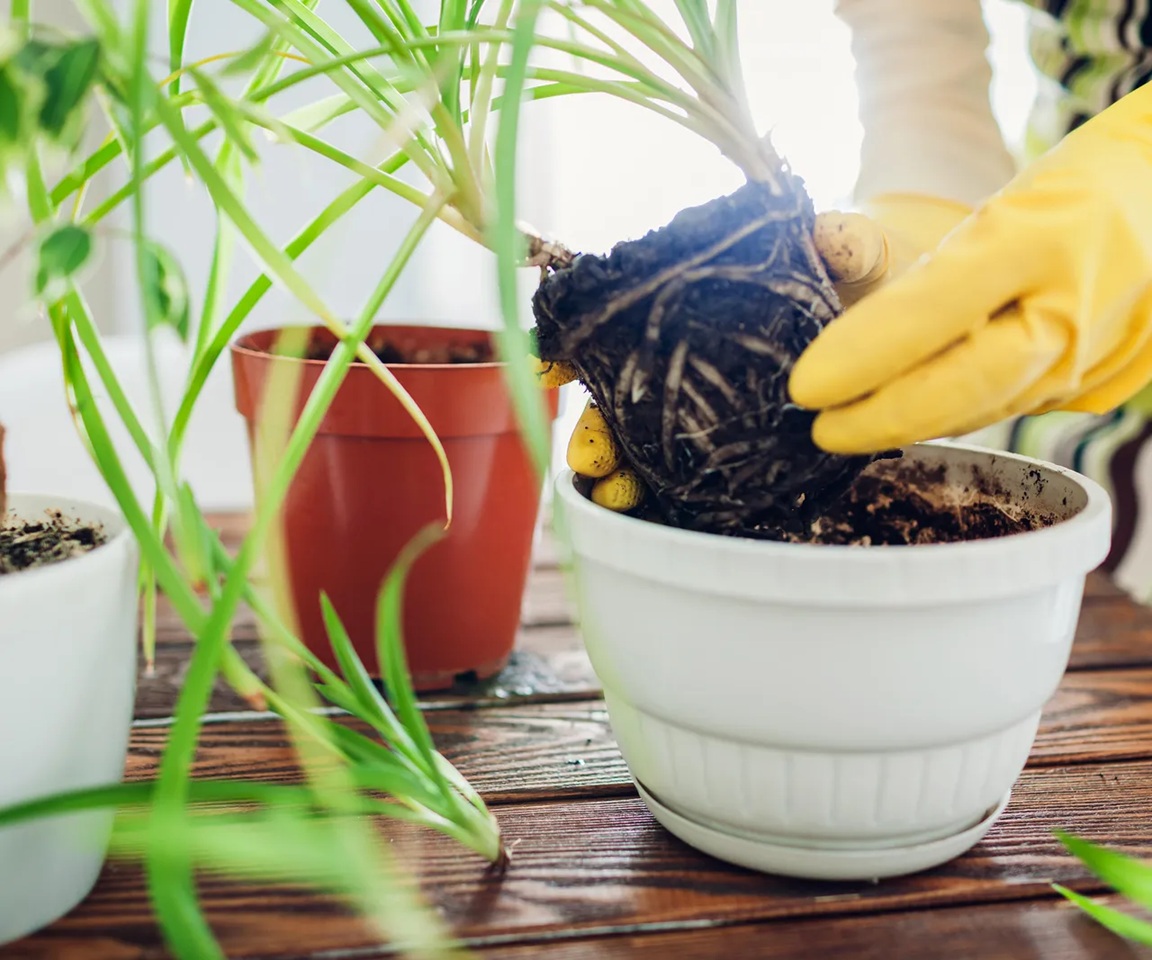
Once the roots have had enough time to establish, it’s time to remove the tube. Carefully cut away the plastic rather than pulling it out, especially if you taped it earlier.
The goal here is to avoid disturbing the root structure you just trained. Taking your time with this step helps keep everything intact and prevents setbacks in growth.
💧 Rinsing
Gently rinse the soil away from the roots that were inside the tube. This will expose the upper portion of the root system while leaving the lower roots undisturbed and still anchored in the main pot.
This step is what starts to create the visual effect—exposed roots above and a stable base below. Be gentle while rinsing so you don’t damage the roots you just spent weeks developing.
Styling and Refinement
Spider Plant Bonsai Exposed Root Structure Close-Up

Shaping and Maintaining the Bonsai Form Over Time
This stage is where your spider plant starts to actually take on that bonsai-style appearance. Up until now, the focus has been on root development and structure, but here you’re refining how the plant looks and grows above the soil. This is an ongoing process rather than a one-time step. Small adjustments over time—light, pruning, and positioning—are what turn a simple setup into something that looks intentional and styled rather than accidental.
🌱 Root Hardening
Place the plant in a well-ventilated area with bright, indirect light. This environment helps the exposed roots gradually adapt to being above the soil surface instead of buried. Over time, the roots will begin to change in both color and texture, often turning slightly green and becoming firmer as they adjust.
Increasing humidity during this phase can help prevent the roots from drying out too quickly while they’re still adapting. This slow transition allows the roots to “lignify,” meaning they become tougher and more stable, which is essential for maintaining the bonsai-style structure long term. Rushing this step or placing the plant in harsh conditions too early can stress the roots and slow overall progress.
✂️ Pruning
Regular pruning is what keeps the plant looking balanced instead of overgrown. Focus on trimming the lower leaves first, especially any that start to droop or block the view of the root structure. The goal here isn’t to reduce the plant drastically, but to guide its shape so the roots remain the focal point.
Without pruning, spider plants will naturally try to grow outward and downward, which can quickly overpower the bonsai look you’re trying to create. By maintaining a controlled canopy, you keep the plant compact and visually structured. Over time, this also encourages healthier, more intentional growth rather than random spread.
🎍 Aesthetic Touches
Once the structure is established, you can start enhancing the overall look. Placing the exposed roots over decorative rocks can add stability while also emphasizing the bonsai effect. This creates a more grounded, sculpted appearance rather than a plant that simply happens to have visible roots.
You can also incorporate small decorative elements like miniature figurines or natural accents. These details aren’t required, but they help turn the plant into more of a display piece. Whether you keep it minimal or add a few subtle touches, the goal is to complement the structure—not distract from it.
Long-Term Care of a Spider Plant Bonsai
Maintaining Balance, Structure, and Healthy Growth Over Time
Once your spider plant has been shaped into a bonsai-style form, long-term care becomes all about maintaining that balance. Unlike a standard spider plant that can grow freely, this version needs a bit more attention to keep its structure intact. The goal is to support steady growth without letting the plant revert back to its natural sprawling habit. With the right care, your spider plant bonsai will continue to develop strength, stability, and a more refined appearance over time.
💧 Watering
Avoid following a strict watering schedule, as this can lead to overwatering—one of the most common issues with spider plants. Instead, check the soil regularly and only water when the top inch feels dry to the touch. This approach keeps moisture levels consistent without allowing the roots to sit in overly wet conditions.
Using rainwater or filtered water is strongly recommended whenever possible. Spider plants are sensitive to chemicals like fluoride and chlorine found in tap water, which can lead to brown tips and overall stress. Over time, better water quality helps maintain healthier foliage and a stronger root system, especially important for a plant that already has exposed roots.
🌱 Feeding
During the active growing season—typically spring and summer—feed your spider plant bonsai with a balanced liquid fertilizer. Using something like a tropical houseplant fertilizer at half-strength every 2–4 weeks provides enough nutrients without overwhelming the plant.
Because this setup is more controlled than a typical pot, it’s important not to over-fertilize. Too much feeding can lead to rapid, uneven growth that disrupts the compact shape you’re trying to maintain. A lighter, consistent feeding schedule supports steady development while keeping the plant balanced and manageable.
🪴 Maintenance
As your spider plant continues to grow, it may occasionally become top-heavy, especially if the foliage develops faster than the roots can support. In this case, using a simple support like a wooden skewer can help stabilize the plant temporarily.
This support shouldn’t be permanent—it’s just there until the exposed roots harden and strengthen enough to hold the plant upright on their own. Over time, as the root structure becomes more rigid, the plant will naturally support itself, which is part of what gives it that true bonsai-style appearance.
Regularly checking the plant’s balance, structure, and overall health will help you catch small issues early and keep everything growing in the direction you want.
Why This Method Works (and Why Most People Never Try It)
Most people grow spider plants the same way—letting them spill out of a pot, produce babies, and take over whatever space they’re in. There’s nothing wrong with that, but it completely overlooks how adaptable this plant actually is.
What makes this bonsai-style approach different is control. Instead of reacting to how the plant grows, you’re guiding it from the start—training the roots, managing the structure, and shaping the overall look over time. That’s something most casual plant owners never attempt, which is why you almost never see spider plants grown this way.
It also changes how the plant behaves long-term. Rather than becoming oversized and unruly, it stays compact, balanced, and intentional. The exposed root structure becomes part of the design, not something hidden underground, and the plant starts to feel more like a living display piece than just another houseplant.
Once you’ve done this once, it shifts how you look at spider plants completely. You start seeing potential in every baby plant—not just something to pot up or give away, but something you can shape, refine, and build into something unique.